Monday 31 December 2012

House Number Bin Stickers DIY - Great Ideas


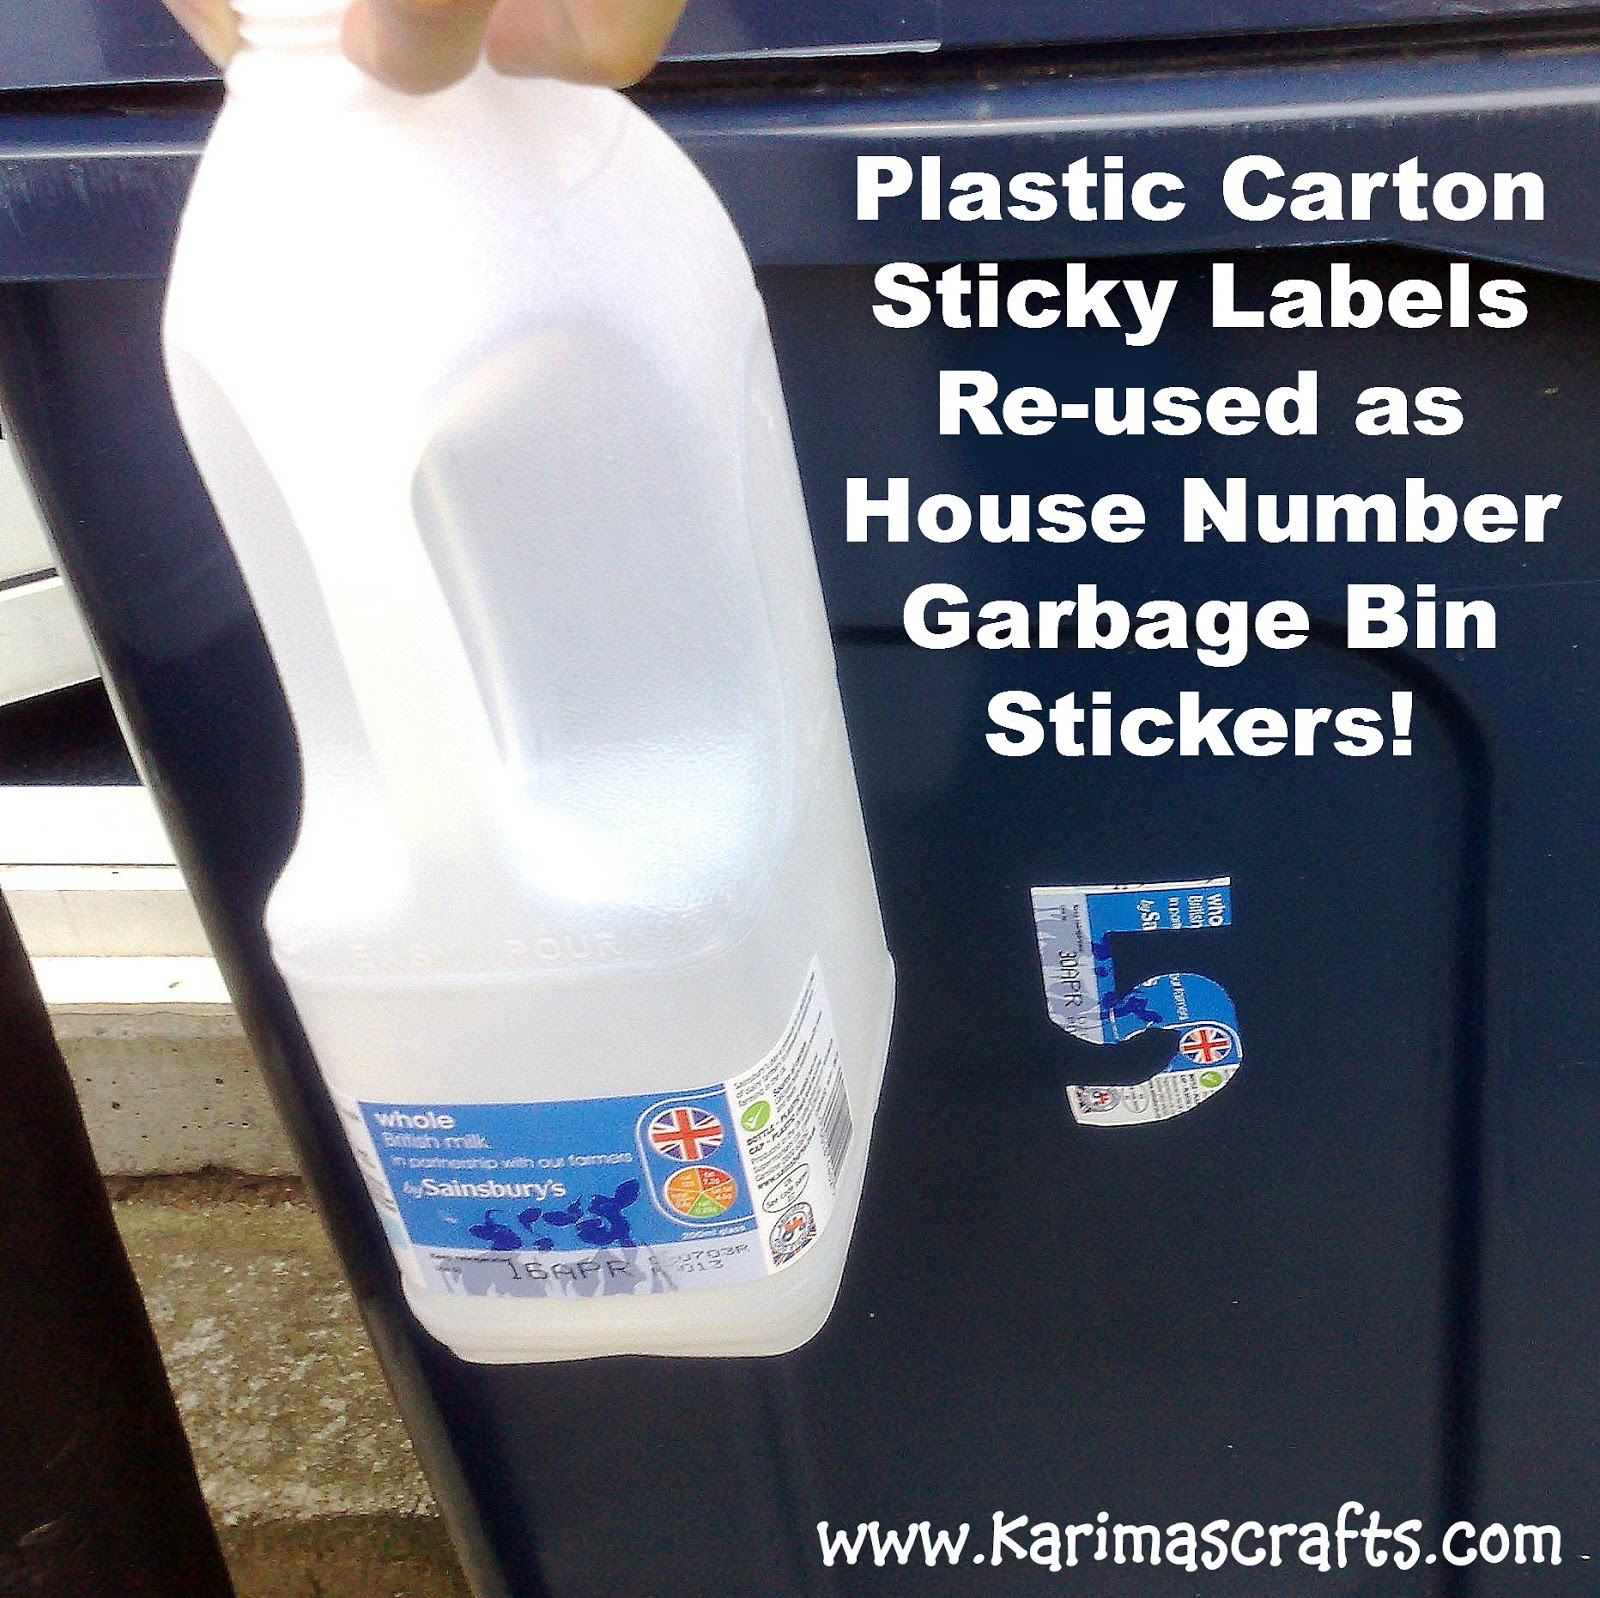
Another upcycle / recycle post using Milk Cartons but it can be any plastic carton which uses sticky labels!

It is normally really easy to remove labels from plastic so you can then re-use these labels. I did this over a year ago and the label is still on the bin - so it is quite durable and weather resistant!

Option One: 

  • Cut the plastic bottle leaving the sticker in place (see photo below).
  • Then draw with pen/marker the number you want on the sticker.
  • Then cut the number out - cutting through the plastic at the same time.
  • Then remove the sticker from the plastic and place onto your bin

Option Two:

  • Remove the sticker from the plastic and place it on a sheet of slippery paper (ie the back sheet from stickers or backing sheet from sticky backed plastic).
  • Then draw the number over the sticker and cut it out.
  • Place onto the bin.

Both options are easy enough - you could even spell out the address as well as the house number if you had enough stickers and enough patience!

If you want some other ideas of upcycling Plastic Cartons below are some past blog posts I have done that you might have missed:

How To Make Funnel (see below): how to make funnel
 
DIY Watering Can using a plastic bottle (see below): great ideas diy watering can
 
 
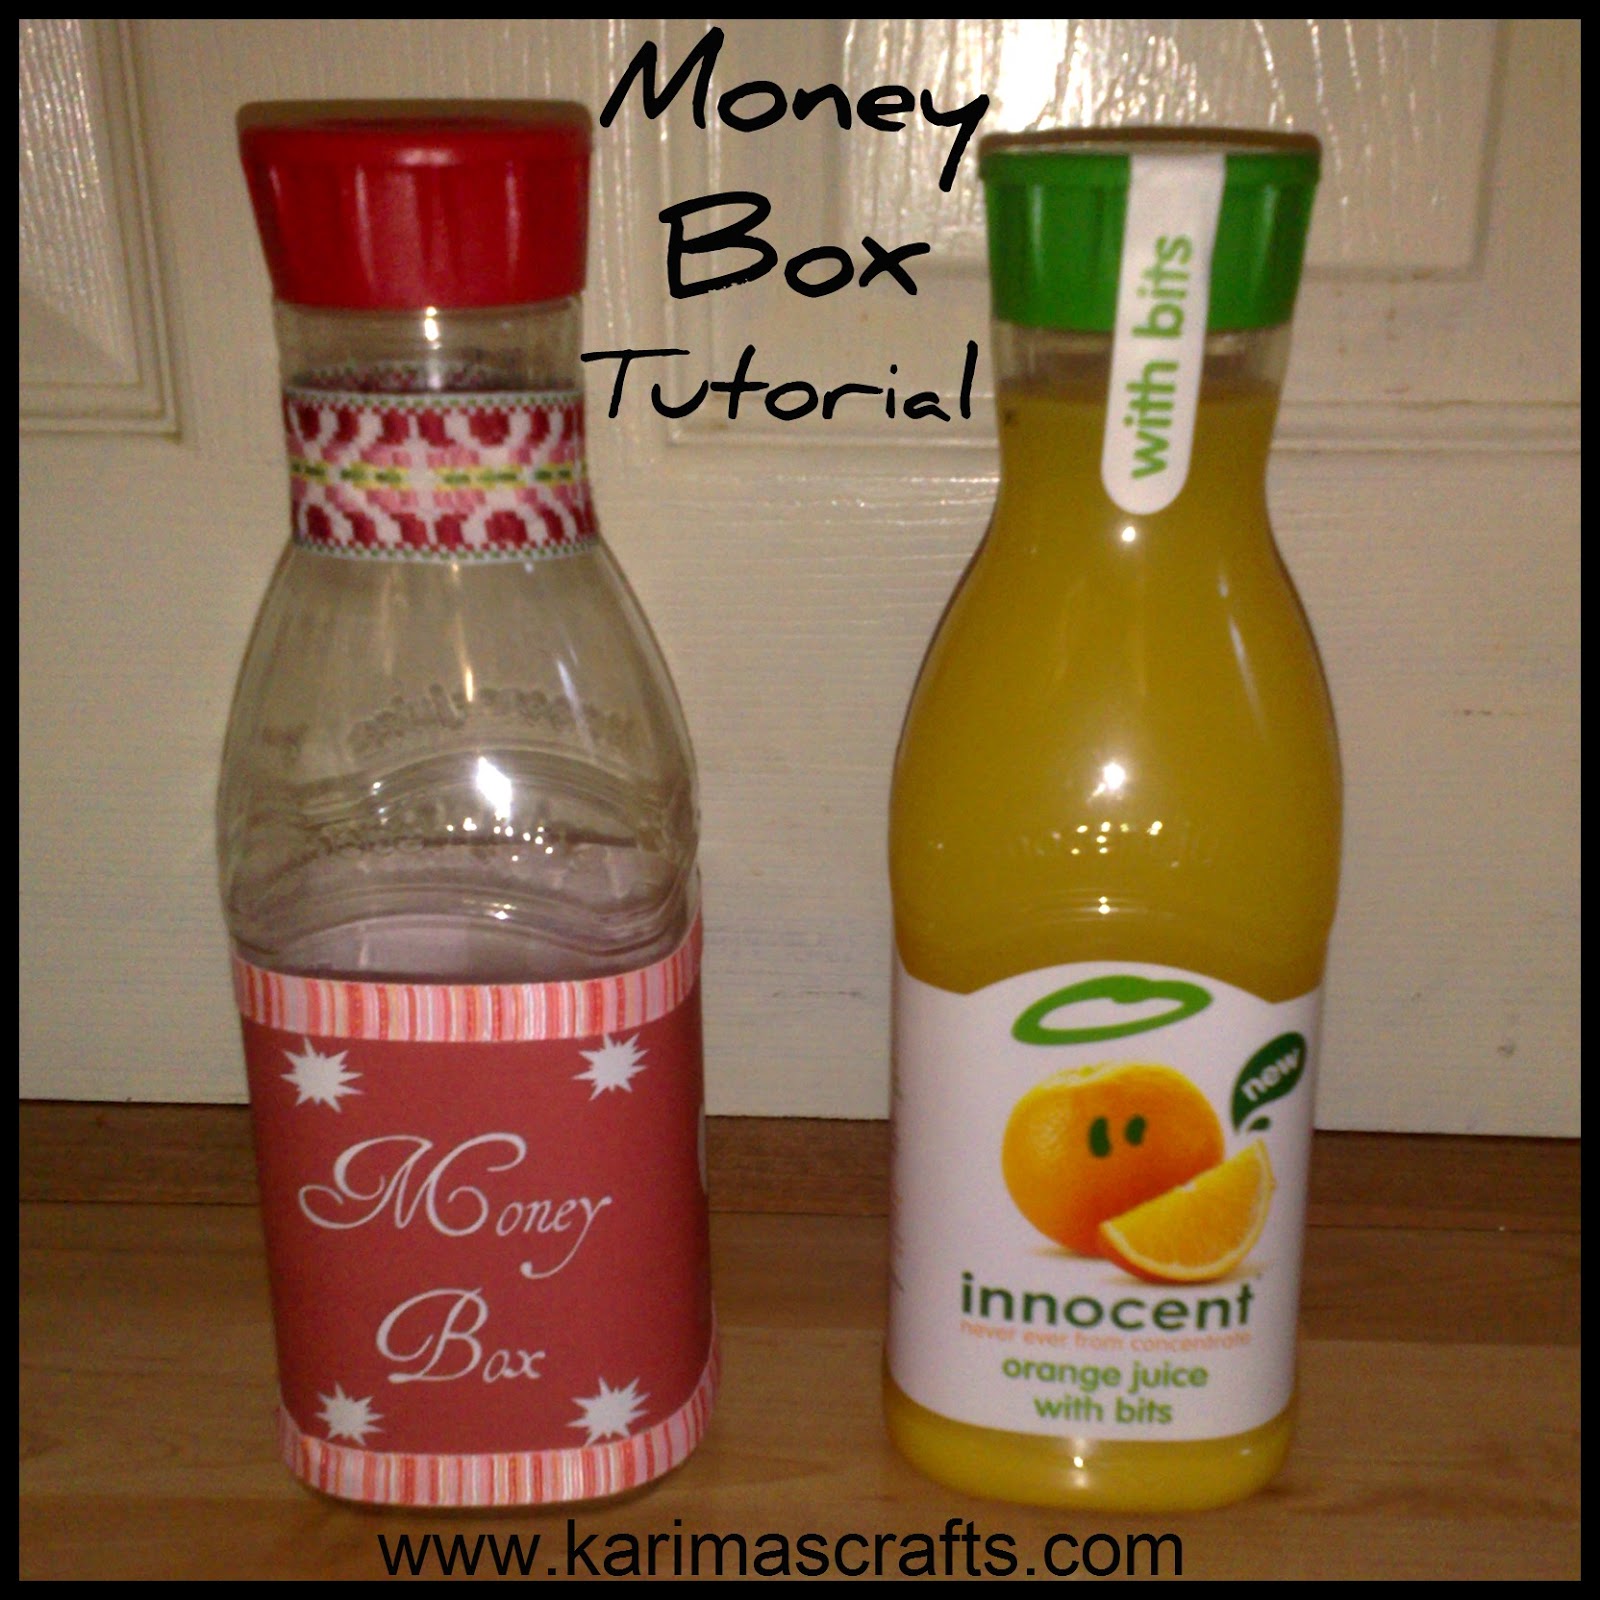
Money Boxes from Plastic Bottles (see below): money box from plastic bottle


I hope you have found some inspiration from these upcycling /recycling tips.


Saturday 29 December 2012

Blog Review: Akhwaat fi sabili Allah

Today I am giving my own personal review of a blog that I follow, written by the lovely Umm Hamza Al Andalousya who has been writing this blog since September 2012. Here is the link: Akhwaat fi sabili Allah


She describes herself as a woman, wife and a mother.  She is a Spanish revert and decided to write this blog to help herself to increase her knowledge of the Deen, then to share with the permission of Allah all the knowledge that she amounted with her sisters in Islam and then realised that maybe it made her get closer to Allah (Subhanna wa taala).
She speaks Arabic which helps her find information in books and sites that the non-Arabic speaker can’t. She would like to use this ability to help sisters to translate any fatwa or an article about a subject. She is also willing to collaborate with sisters, maybe they have a fatwa a nasheeha of a a3lim or something else that they believe is benefit for the Muslim women, they can send it to her. She will then post these in her blog with details of who sent it etc.
A lot of her posts start with a question which she then gives a detailed answer. Her topics are varied covering Islam in particular issues concerning women and their religion.

Here are some of her most popular posts:
Dressing to our Girls:  dressing to our girls
A guide to the sisters students of knowledge:  a guide to sisters students of knowledge
A message to the woman – Lecture of Shaikh Fawzan, Must See!!:  a message to woman lecture of shaikh
Lovely quotes on Frienship:  lovely quotes on frienship
Please pop by and have a look at this great blog, I really do enjoy reading her posts, you can also follow her blog via:
Google + – Google +
Facebook – Facebook Page


Monday 24 December 2012

My Recent Crochet Projects

hat and scarf crochet muslim blog
 
I have just started crocheting - with the lovely online help of some lovely Muslima Ladies.
 
I thought I would share with you what I have made in the last few weeks. I did try to use patterns but unfortunately I still need some practise with this as I couldn't manage to follow them and just did my own style.  I am quite pleased with the results considering I just kind of winged it!
 
The photograph above shows a hat and scarf set I made for my 5 year old daughter.
 
The photograph below shows a doll's hat and scarf set that I made for my daughter's doll. I used the same colour wool as the photograph above. 
 
hat and scarf doll crochet muslim blog
 
The photograph below shows some slippers I made for my 5 year old daughter - also using the same coloured wool!
 
crochet slippers muslim blog
 
The photograph below shows the very first hat that I attempted.  I made this one for me. I tried to follow a pattern but couldn't manage but it still turned out OK for me.
 
 
 The photograph below shows a hat I made for my 10 year old daughter. She was so inspired by her hat that she decided to learn to crochet too. The scarf she is wearing was the first project she made.

 
The flower below was my first attempt to make a large crochet flower. As of yet I don't know what to do with it!
 
 
The photo below shows an ear warmer that I made for my 10 year old daughter. It was going to be a headband but I decided a large Ear Warmer would be better in this winter weather!
 
 
Hopefully I will continue to start some more projects soon and share them with you, inshallah.


Monday 17 December 2012

Spray Painting Shoes Gold - Great Ideas


Give your old shoes that are either damaged or scuffed a makeover instead of throwing them out!

The photo above shows some shoes that belonged to my daughter, they were pink and shiny but became stained and the toes were scuffed so she didn't wear them. With a can of spray paint I transformed them into a new pair of shoes for her.

In case you are interested in how I did this, I will briefly explain for you. I placed the shoes on some newspaper outside and gave them 2 coats of spray paint. I painted the soles as they are open at the sides but I didn't bother spraying the inside of the back of the heel as these are covered! For other shoes you would simply stuff them with some newspaper so that the spray paint doesn't touch the inside soles.

The reason I used gold was she needed some gold shoes for something specific and I already had some gold spray paint in the house from a previous project!


Monday 10 December 2012

Crocheted Plastic Bag Tutorial


crocheted plastic bags upcycle muslim blog

I have just learnt how to crochet about 2 weeks ago and made this lovely Plastic Bag from plastic bags! It is so easy to do - I have wanted to do this for years after seeing one on the internet, but as I couldn't crochet had to wait until I learnt!

I did try to crochet last year with supervision but gave up straight away after I didn't have the help to continue! However, I have recently joined a lovely online group of Muslima crafters and they have been so supportive and given me great advice and support that I now know how to crochet!

I have been making some simple scarves, hats, headbands and some flowers to decorate them with. I am so pleased with my new craft and will hopefully be sharing with you some of my work inshallah.

Below is a larger photograph of the bag I made. I am using it to store my wool for future crochet projects!


I actually didn't follow any particular pattern for this bag - I just started with a large circle and then started crocheting upwards similar to a hat pattern I tried recently - then kept going up! To make the handle, I made 3 plaits and then plaited them together to make a strong long handle and then fastened them on with knots from the plastic bags. I know the bag is not perfect as I am just a beginner but it is practical and works for me!

I found some instructions on how to make the plastic bags into yarn from the site I have highlighted below:
www.myrecycledbags.com

The same site also has a tutorial on how to make a bag which I have also highlighted below:

http://www.myrecycledbags.com/2007/05/18/recycled-plastic-grocery-tote-bag/

This site is brilliant and she shares quite a few other tutorials on things you can make with plastic bags!


Monday 3 December 2012

Spray painting an alternative to buying new - Great Idea!


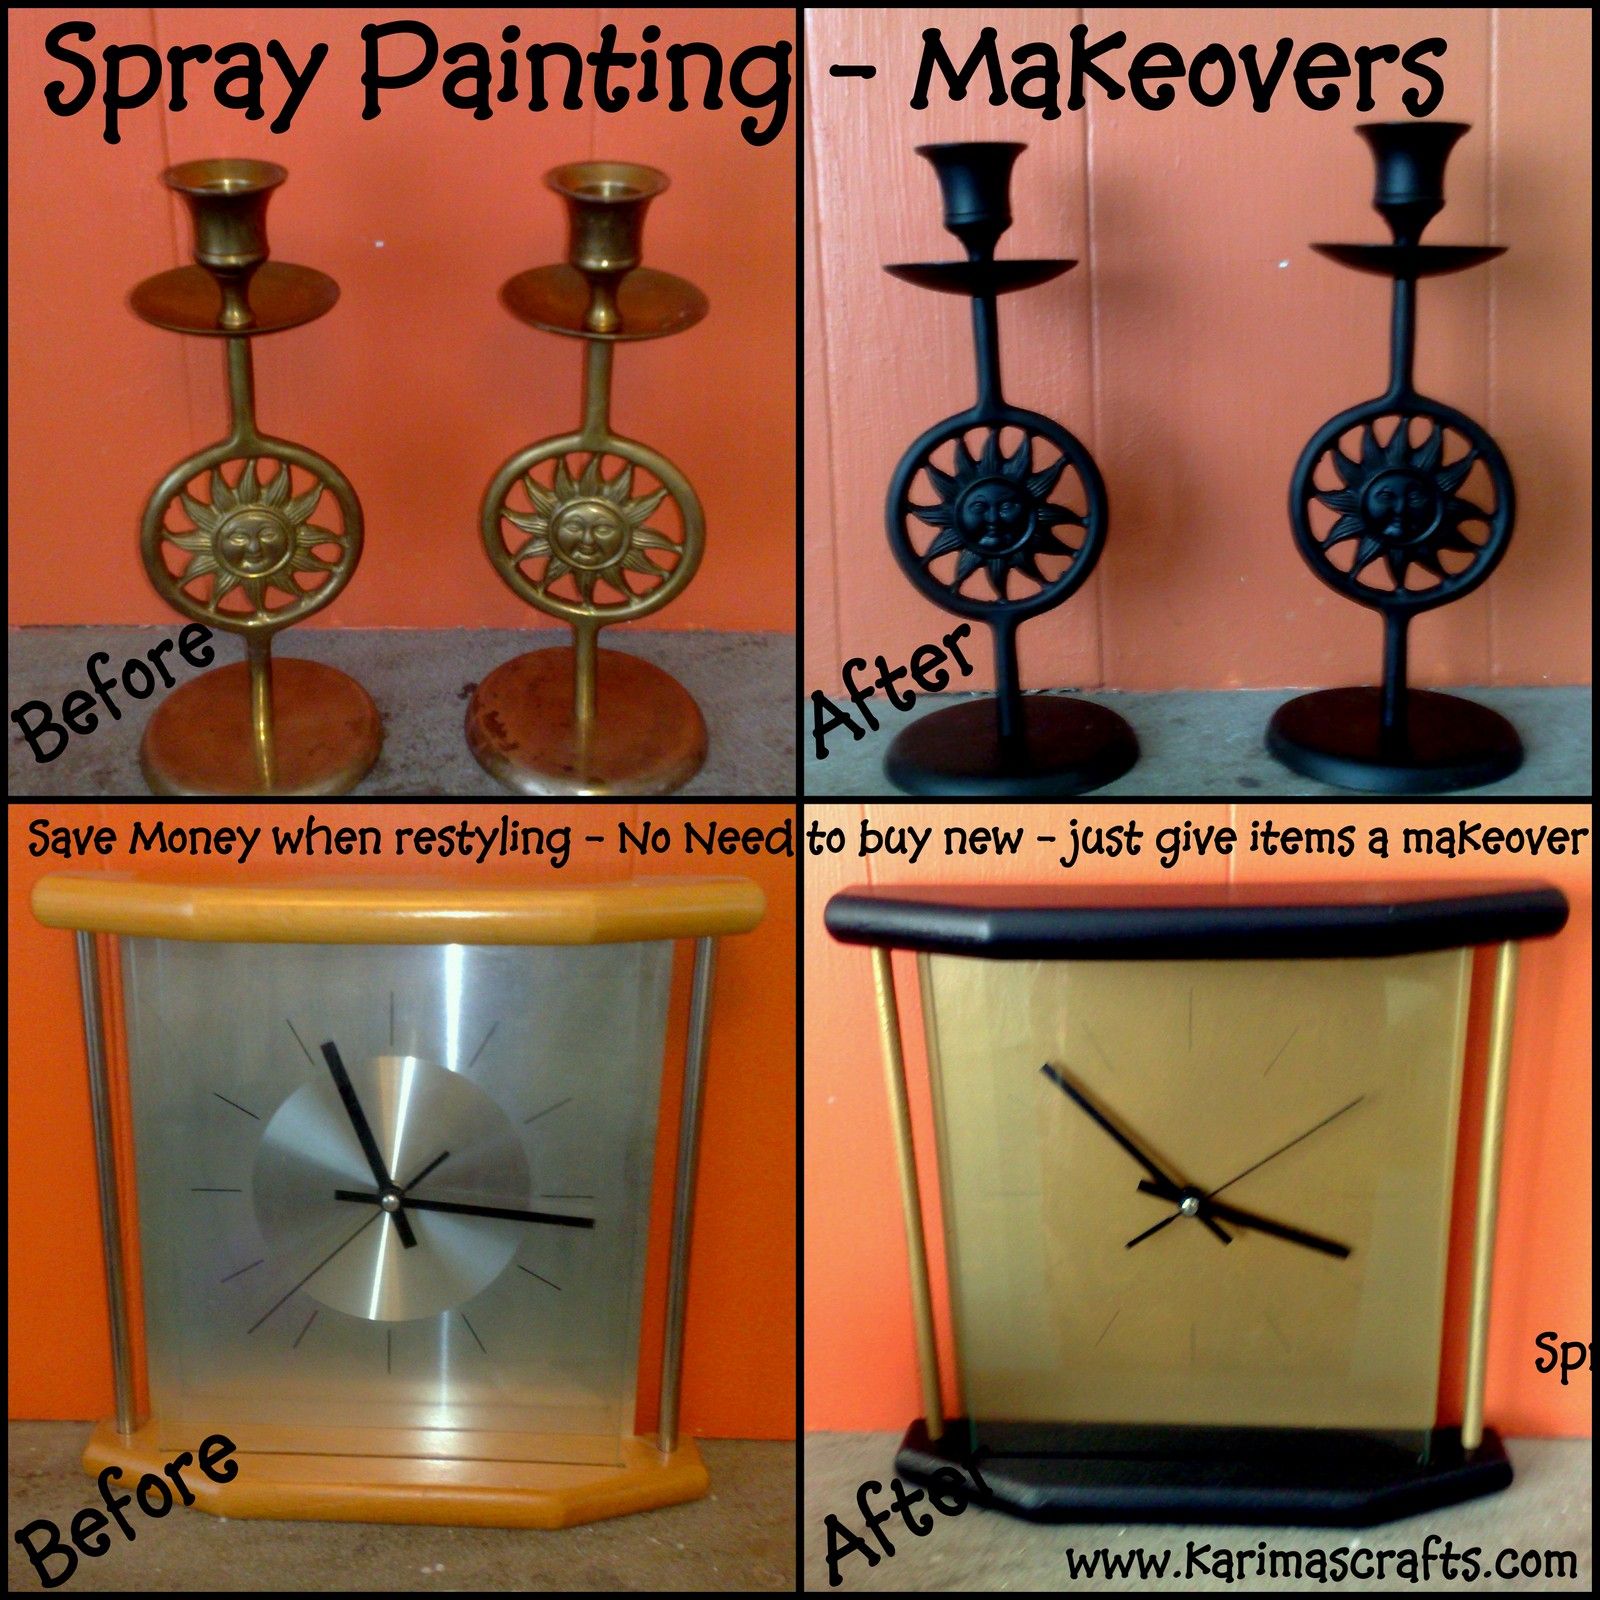
I recently changed the colour decor in my living room to a gold and black style.  I didn't want to spend too much money - so I used my cans of spray paint and got to work with some of the ornaments and the clock that I already had.

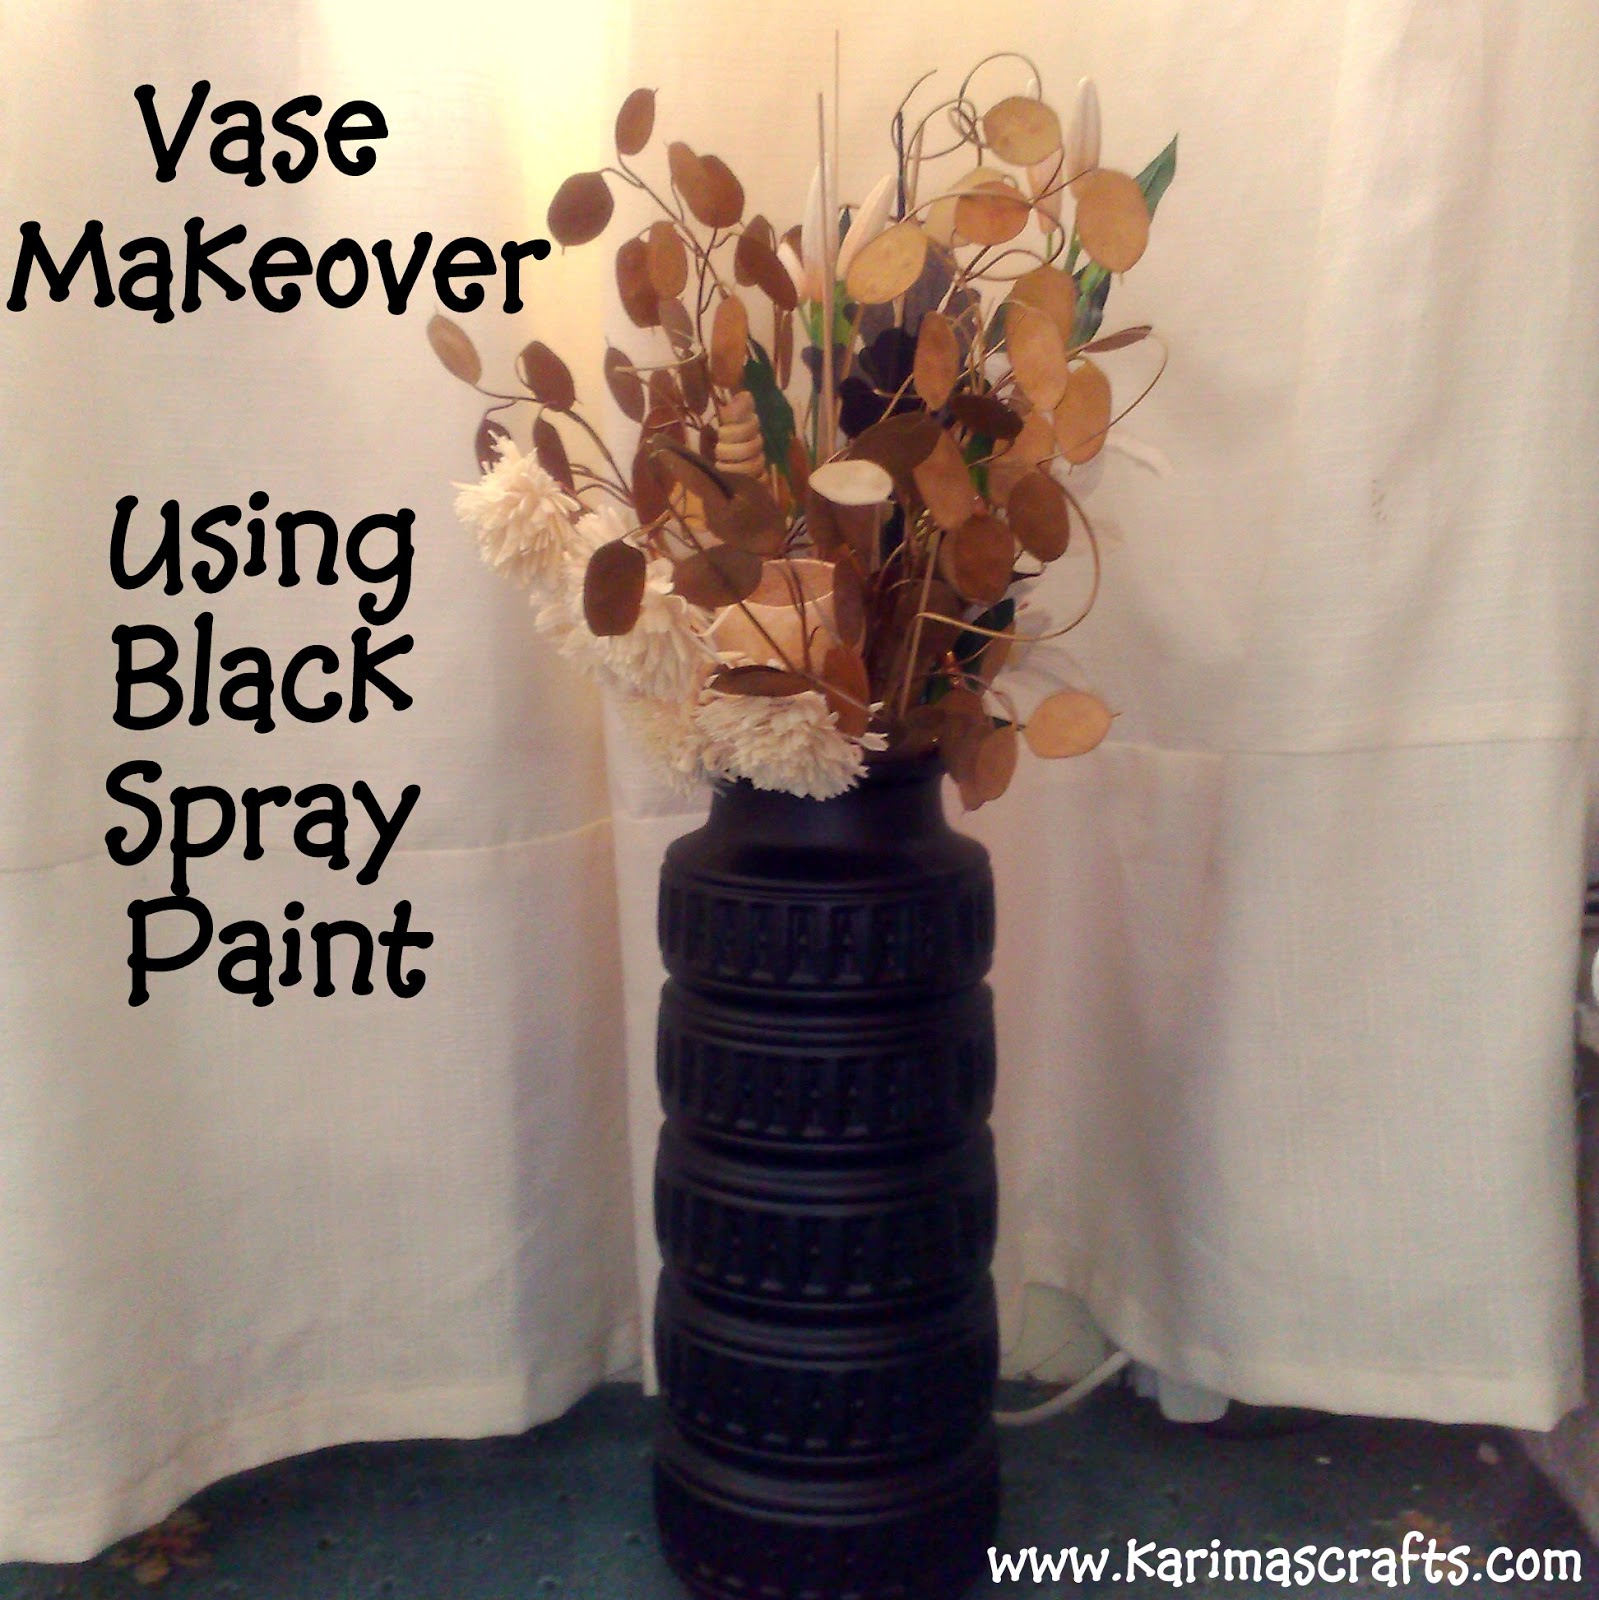
I changed the brass coloured candlesticks to black and the wooden and silver clock frame to black and gold. Remember the post about my large old vase I had spray painted red - well now it's black!


Here are the before pictures of my vase before it was spray painted black: vase-makeover


Below is a photograph of one of my black and gold cushion covers which I made to match the decor too.


Spray painting can be a great cheaper alternative than spending a lot of money on new accessories.

My post this week is linked to:
  Pink Hippo Partyapinchofjoy.com


Monday 26 November 2012

Hair Accessory Tutorial


This is a tutorial on how to make a large flower hair accessory. These can be worn by children as a hair decoration and some ladies I know wear them as a hair volumiser under their hijab. Many I have seen in stores / online were large flower clip ones which looked just like one of the flowers I had in my house!

So, I decided to make one myself from the materials I already had at home - so a completely free project yeah!

Requirements
  • Large Flower (not real one obviously!)
  • Hair Bobble / or a Clip
  • Needle and Thread (optional craft glue)

Instructions

Step 1: Remove the stem or any other attachment
Step 2: Hand Stitch where any part may need securing after removing stem etc.
Step 3: Hand sew the bobble onto the flower - securing tightly - or use craft glue (If using Clip - either hand sew or use craft glue)

As you can see this is a really quick and easy project to do and saved me quite a lot of money!

Added Notes:
I am not an islamic scholar and I know some people have commented that the hijab volumisers are haram so I am sorry if I have upset anyone. I don't personally wear these flower accessories as I like a simple hijab but I do know many ladies who wear these and a friend of mine asked me about making one and this was my solution. I am not here to encourage people to wear them as a volumizer that is a personal choice.  These can simply be worn as a hair accessory which as far as I know isn't haram.  Thanks for your feedback.


My post this week is linked to:
  Pink Hippo Partyapinchofjoy.com


Monday 19 November 2012

How To Cut Onions Without Crying - Great Ideas

How To Cut Onions without crying - Goggles


I watched a children's cooking program on the TV the other week and this young girl was wearing some special onion goggles! I had never heard of these before and thought what a brilliant idea. Then I went online and saw the price of these goggles and thought they were a bit to pricey for me!

So me being me, I tried to think of an alternative cheaper way and after realising how these goggles worked thought about using my daughters swimming goggles!  I hated chopping onions because my eyes have always been so sensitive.  I also wear glasses for everyday use and I couldn't wear them immediately after chopping onions as I couldn't see properly due to the irritation and tears! To my amazement these goggles actually worked!

Yes I may look a little silly in the kitchen for a couple of minutes - but believe me they are worth it if it means I don't have to suffer!  I have tried this maybe 6 times now and they have worked perfectly and since trying this I have noticed that quite a few people have done this in the past and all agree they work.

In the past I have tried chewing gum when chopping onions, which for some reason it does seem to work occasionally but not all the time! I read on a site that if you breathe in through your mouth it catches the onion gases before they reach your eyes, so maybe the chewing gum part is the fact you may open your mouth and catch the gases!

Has anyone else tried the goggles method or have you got any other solutions for no tears that you would like to share?


My post this week is linked to:
  Pink Hippo Partyapinchofjoy.com


Monday 12 November 2012

Felt Gingerbread Man Tutorial

Felt Gingerbread Man Tutorial
 
This project was made by my 10 year old daughter and is a quick and easy craft for children to take part in. They can experiment with many different materials to make up the buttons and eyes, but we just stuck to using different colored felt. The orange felt came from an old jumper that I felted so another upcycling project completed.
 
Requirements
 
  • Cut out shape of a gingerbread man (either download or draw around a cookie cutter)
  • Orange or brown color felt
  • Varied colour felt for button shapes and face detail (or you could use real buttons)
  • Stuffing / wadding
  • Rick Rack (zigzag ribbon)
  • Fabric Glue (optional)
  • Needle and Thread. 
 
Felt Gingerbread Man Tutorial
 
Tutorial:
 
Step 1: Using the cut out shape of a gingerbread man draw and cut out 2 pieces from the orange/brown felt.
Step 2: Cut out some shapes for the eyes, nose, mouth and buttons.
Step 3: Attach the pieces to one of the gingerbread man pieces. (Use either fabric glue or sew a couple of stitches to secure each piece).
Step 4: Sew together the other gingerbread man to the first piece - leave small gap so to insert some stuffing and then close the gap with stitches. (blanket stitch was used for this)
Step 5: Sew on the rick rack around the wrists and ankles of the gingerbread man.
 
You now have your very own gingerbread man. These can be used as children's toys or as decoration for the house.
 
 
My post this week is linked to:
  Pink Hippo Partyapinchofjoy.com


Monday 5 November 2012

No More Naked Barbies Tutorial - Great Ideas


no more naked barbies tutorial muslim blog
If you have children, then you will probably know that children just love removing the clothes from their dolls and very soon you have plenty of naked dolls lying around!
I saw a photo on Pinterest (sorry I don't have the link as I forgot to Pin it!) which explained you can fix this with some nail polish - I couldn't believe I hadn't heard of this before now! So I decided to try this out for myself to see if it works.- AND IT DOES!

This is so easy and quick to do that really you don't need much of a tutorial for this but I thought I would give a super quick one just for you.

Requirements:

  • Barbie (or similar doll)
  • Nail Polish (any colour)


Instructions:

Step 1: Hold the doll or place her on a piece of paper on flat surface (I tied the dolls hair up so out of the way!)
Step 2: Using the nail polish paint an outline of a swimming suit and then completely colour the suit (you can do one side of the doll at a time if it is easier)
Step 3: Place the doll on all fours, as in the photo below so that the polish can dry easily.
Step 4: Once dry do another coat (this may be sufficient depending on the polish - if not add a 3rd coat after allowing time to dry)
Step 5: Barbie doesn't look naked now and is ready for the child to dress if they wish!


no more naked barbies tutorial muslim blog

You could even add some glittering stickers to make the swimming costume look more jazzy. I have even seen online that people have used Sharpie pens to cover Barbies nakedness.

My post this week is linked to:
  Pink Hippo PartyMixitupapinchofjoy.comPhotobucket


Monday 29 October 2012

Money box from a plastic bottle - great upcycling idea

money box plastic bottle upcycle muslim blog
 
Here is a tutorial on how I made some money boxes from used plastic bottles. I actually prepared the bottles but the decoration was actually done by my 10 year old daughter.
 
My daughter just raided the scrap fabric bin and printed off some designs on the printer to make these lovely money boxes, so this was a very inexpensive project.
 
money box plastic bottle upcycle muslim blog
 
Requirements:
 
Plastic bottle and lid
Printed pictures
Ribbon / Lace
Glue / Double sided tape
Knife / Scissors
 
Instructions:
 
Step 1: Remove all labels and clean the bottle.
Step 2: Puncture a hole into the lid (I used a knife but you must be very careful this can be dangerous!) I used a screwdriver to make the hole wide enough for coins.
Step 3: Decorate your bottle. New labels added using double sided tape. Ribbon was glued around the neck of the bottle.
 
 
Below is another money box that my daughter decorated. This really is an easy project that the children can join in with. As long as the hole in the lid is done by an adult the rest of the money box can be decorated by the children.
 
money box plastic bottle upcycle muslim blog


My post this week is linked to:
  Pink Hippo PartyMixitupapinchofjoy.comPhotobucket