Monday 30 April 2012

Cupcake Pinata Tutorial

cupcake pinata tutorial

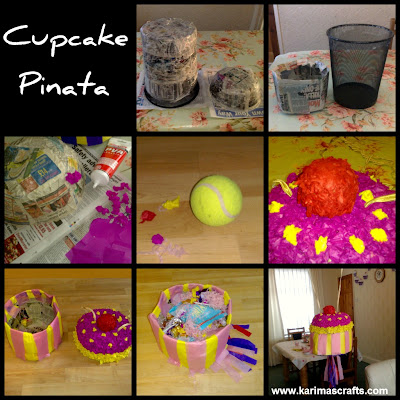
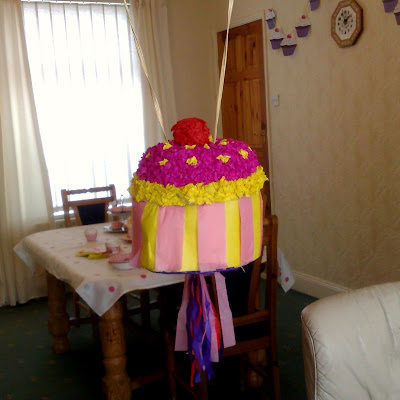
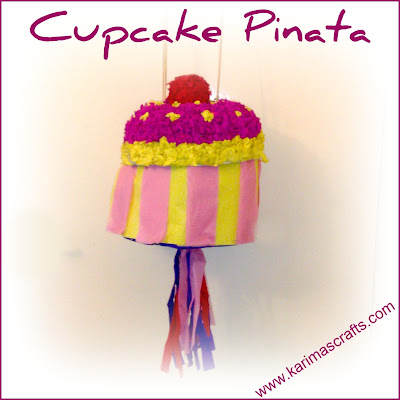
This is a photograph of a Cupcake Pinata that I recently made for a party. The whole party was a Cupcake Theme. Here is the link to my post about the party: cupcake-party-theme

cupcake pinata tutorial


Things to use for the shape of the cupcake - I used a wastepaper bin for the base and a mixing bowl for the top and a tennis ball for the cherry. You can find other things that are similar in shape. I used wallpaper paste for the paper mache but you could make up your own recipe. I wanted the width of the top to match roughly the same shape as the bottom so that they fit together nicely. You could decorate a stick with tissue paper for the pinata bashing stick. When removing the paper mache from the moulds don't worry too much if it tears - you can staple or glue it together because you are decorating it so you can cover any errors.

Requirements:
  • Waste Paper Bin
  • Mixing Bowl
  • Tennis Ball
  • Cling Film
  • Newspapers (Cut in strips)
  • Wallpaper paste
  • Tissue Paper (variety of colours)
  • Basic PVA / Craft Glue
  • Cord or String (to hang up the Pinata)
cupcake pinata tutorial

Step 1: Prepare the paper mache paste (I used Wallpaper paste) I used a disposable plastic bowl for the paste.
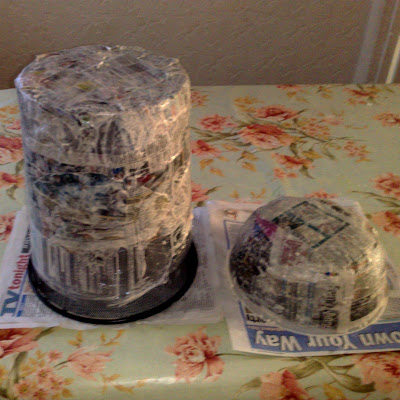
Step 2: Place Cling Film around the bin and around the plastic mixing bowl (This helps to remove the paper mache from them.
Step 3: Place the strips of paper and paste all over the bin and bowl. ( I only went to the height I required.) I did about 2 layers.
Step 4: Allow these to dry (I left overnight) I applied another layer the next day - but its up to you how you prefer.
Step 5: Once dry - remove the paper mache moulds from the bin and the bowl carefully.
cupcake pinata tutorial
  
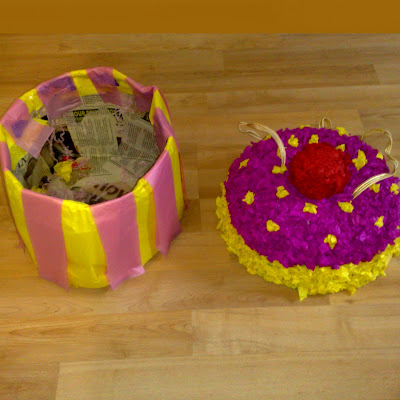
Step 6: I cut small pieces of tissue paper and scrunched them up into small balls and glued them onto the bowl mould - this took quite a while! My children joined in with this part of the project.
cupcake pinata tutorial

Step 7: Place the scrunched up balls of tissue paper around the tennis ball - this makes the cherry.
Step 8: Decorate the bottom of the cake (bin part) as you wish - I chose large coloured strips down the side.
Step 9: Once the glue has dried I attached the cherry by stapling it to the top - you could either glue it on or find another way to attach it. I also added long strips to the underneath of the cupcake (optional).
Step 10: I attached the string to the top of the cupcake - by making 2 slits evenly measured and tying knots hidden underneath the cupcake top.
cupcake pinata tutorial

Step 11: Fill the pinata with your chosen goodies - I chose things not to heavy!
Step 12: Attach the top to the bottom of the cupcake. I had to slightly cut into the top of the bottom of the cake to make sure that the top slid onto the bottom more easily, I hope that makes sense! To fasten this I had to place strong clips through both. I did try to staple the two together but my stapler is not a heavy duty one and it didn't work - but it should with a good stapler!
Step 13: Hang your Pinata and watch as the party children totally destroy your hard work arghhhhh!
cupcake pinata tutorial

cupcake pinata tutorial


You may find me at the following parties:

  Pink Hippo PartyMonday Monkey Hop at Mommy of Two Little MonkeysKeeping It SimpleA Marvelous MessThe Girl CreativeMixitupmop it up mondaysThings that make you say: apinchofjoy.comOur Delightful HomePhotobucket


Monday 23 April 2012

Cupcake Party Theme

cupcake party theme
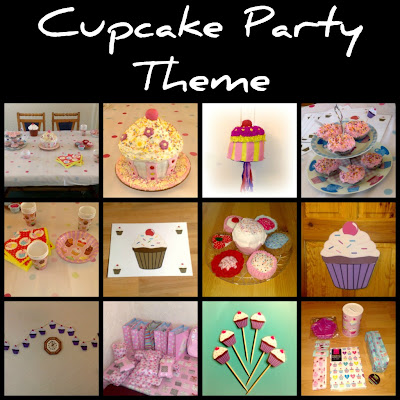
We recently had a cupcake theme party! The photograph above shows some of the things that were cupcake related. I shall hopefully do some future posts showing some tutorials on how I made some of these things.

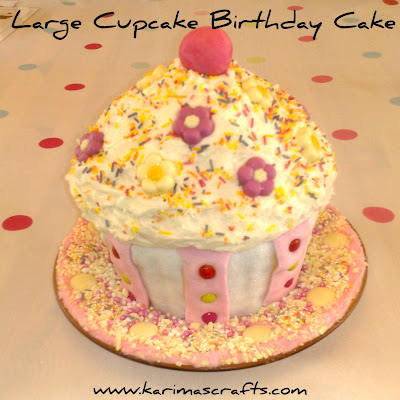
I borrowed a friends large cupcake mould to make a large cupcake cake - This was my first attempt at decorating a cake so was pleased with the outcome for a newby!  I also made some small cupcakes for the guests too!
cupcake party theme cake


I also decided instead of 'Pin the Tail on the donkey Game' that we would have 'Pin the Cherry on the Cupcake game' so I printed of a large cupcake and had the children blindfolded playing this game.

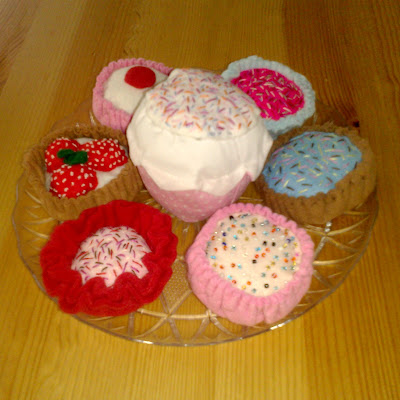
I also made some cupcake bunting to decorate the walls.  I made some cupcake toppers to place onto the small cupcakes.  I recently visited a craft fair and found the cutest fabric cupcakes so bought some to place into the cupcake party bags that I bought for the guests.
cupcake theme party fabric cupcakes

The cups, bowls and napkins were also decorated with cupcakes to carry on with the theme.  I made some laminated place mats with cupcakes on that were given to each guest at the end of the party for them to take home.

My daughters wanted a Cupcake Pinata - so I made one! I have never made a pinata before but was quite happy with the outcome - I made this with paper mache. I will hopefully do a future post showing the tutorial of how I made it.

cupcake party theme pinata

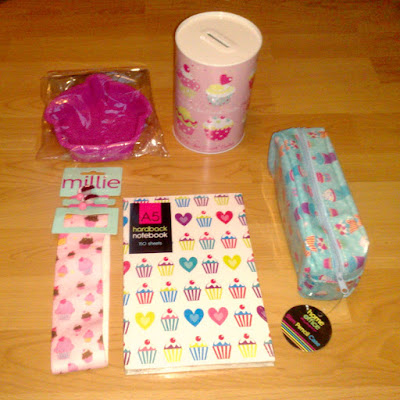
I bought some cupcake themed gifts which I wrapped up as presents for the games that we played during the party. Some items were Cupcake Money boxes, Cupcake Notepads, Cupcake Pencil Cases, Cupcake Headbands and a small Cupcake Cake mould.

cupcake party theme presents

Some items that were also placed into the Cupcake Party Bags were some Cupcake Bath Gels, Cupcake Pens and some Cupcake Laminated Bookmarks.

There was one boy invited to the party so I managed to print of some boyish pirate cupcake themed gifts which were: Pirate Place mat, Pirate Bookmarks and I bought a couple of boyish gifts for the prizes so he didn't feel that left out!


You may find me at the following parties:

  Pink Hippo PartyMonday Monkey Hop at Mommy of Two Little MonkeysKeeping It SimpleA Marvelous MessThe Girl CreativeMixitupmop it up mondaysThings that make you say: apinchofjoy.comOur Delightful HomePhotobucket