Monday 28 October 2013

31 Day Home Organising Challenge


I decided to give myself an Organising Challenge. A few of my blogger friends had mentioned it, so thought I would also participate in doing one. I started this last week, and have managed to complete 4 days of challenges. It isn't a challenge that I have to participate in every day as quite frankly I would find that too challenging with everything else I have to do during the day!

My friends are all being very supportive and we are sharing ideas with each other about possible projects. Some of my friends and followers have just finished taking part in a 31 Day Fajr Challenge - Details could be found on my Facebook Page, some are still doing this one.

I will try to do a weekly post updating exactly what challenges I managed to complete during the week Insha'Allah.  I will try to provide before and after photographs where I can, if not I will definitely try to make sure I have some after photos - not sure I want to publish all the before ones.

If you are inspired and wish to participate in this challenge then you can follow me on my Facebook Page which I will update every time I have completed a challenge. I would love it if some more people were getting involved with organising their lives or homes.

Day 1:  Girls' Bedroom - I dismantled their beds and put up some bunk beds in their place. I managed this myself with a little bit of help with my son to fix both beds together! This has made their room look much larger now!


31 day home organising challenge muslim blog


31 day home organising challenge muslim blog


Day 2: Girl's Bedroom - Tidying up the Wardrobe Area. I placed a curtain to cover the part where the broken door was missing to make it look neater.  No more junk on top of the wardrobe.

31 day home organising challenge muslim blog

31 day home organising challenge muslim blog

Day 3: Hair Accessories/Equipment Box - This is kept underneath the sofa for the girls to get to easily. All the items were messed up in one box, now I have organised the headbands into a zipped container, the hairbands into a plastic box, the misc. into a plastic box and hairclips into a zipped plastic bag.

31 day home organising challenge muslim blog


 Day 4: Kitchen Shelves - I tidied up the shelves as they were beginning to be a bit of a dumping ground, which wasn't the original idea! Now they look neat and tidy and being used for the correct purpose now.

31 day home organising challenge muslim blog

31 day home organising challenge muslim blog


In case you are wondering who the other bloggers are that are participating, they are:
http://www.mariampoppins.com/
http://traditionalmuslimah.blogspot.co.uk/


Tuesday 22 October 2013

Chair Tent Tutorial

chair tent tutorial muslim blog

I made this Chair Tent a few years ago but never actually got around to blog about it! I did blog about a Table Tent that I made, so I thought it was about time I did a post for the Chair Tent too! These are great and much more secure than just throwing a few sheets over the top of the chairs or table! It also folds up really compact (as can be seen in the photograph) and can be placed inside a bag and stored away easily!

I like this particular design as it is more spacious and taller than than the Table Tent. You can also move about more freely inside and the kids don't bang their head when they stand up!

chair tent tutorial muslim blog

To make this I just used spare fabric that I had lying around, I have used 3 different types of fabric altogether for this project, this would be an ideal project to use up unwanted bed sheets, duvet covers etc. You could also just buy some fabric specifically suitable for children to make the tent even more appealing, but to be honest the kids aren't too bothered about what it looks like outside, they just love the fun of being able to go inside!

When I first made this, I hadn't seen any tutorial for these, but I had seen a photograph of a chair tent that somebody had made for their children. It really isn't too hard to make.  You just need to make sure that you get the height about right so that you haven't got a lot of excess fabric at the bottom of the tent. You can make the length at both edges your own size as you just move the chairs accordingly to the size of the fabric.

I recently did a Google search for a 'Chair Tent Tutorial' and managed to find a really good one with some photographs and step by step instructions that were easy to follow, here is the link to that tutorial: http://www.instructables.com/id/Super-Cool-Chair-Tent/ here is the photograph:


I haven't written a full tutorial on this blog post as I didn't take any step by step photographs and to be honest it is basically the same tutorial as the one on the link I have shared except I didn't use the same width and length as the one in the Instructables Website Tutorial. I also made the chair flaps a bit longer so that they attach more securely to the back of the chairs! It really is a simple thing to make as you are just attaching lots of rectangle shapes together and it is much better than just throwing a couple of sheets over the chairs!

In case you were interested and missed my Table Tent here is the link and some photographs below: table-tent-for-kids.


Monday 14 October 2013

Easy Cardboard Box Castle


Today's craft is showing how easy it is to make a Castle out of a cardboard box! I have photographs of two castles made by children (inc. my own children). We went on a tour with a lovely group of homeschooled children to Durham Castle. The tour guide then supplied the children with cardboard boxes and asked them to make a castle. The children really enjoyed themselves. My 6 year old made one by herself, however my 11 year old worked in a group with 2 other girls to make a joint castle project!

The photographs below shows the castle that my 11 year old daughter made with her friends. They used the parts of the cardboard that they cut out for the roof to add onto the castle to give it a great effect! They even added a flag. They didn't have a lot of time to make these, if you do this at home and you have more time and crafts, you could add a lot more detail to your castle. This is a great way to recycle an old cardboard box to make a craft project!


This is the castle that my 6 year old made. I helped her to try to cut at the sides to make openings for the windows/door. She also drew some lovely flowers to decorate the outside of the castle. Not very neat cuts in the photograph but we had very limited equipment and blunt child scissors to cut with! When she got home she added some folding stairs inside and played with it with her small little dolls! It really is very easy to make a castle, it doesn't have to be a square castle, you could make a castle form a rectangular cardboard box too! If you type in 'Cardboard Box castle' in Google Images you will get some more inspiration of how to design a Castle from a cardboard box.


Below is a photograph I took of the castle that we visited. The children really enjoyed themselves. We also visited Durham Cathedral which is right next to the Castle.


Monday 7 October 2013

Easy Cupcake Pincushion Tutorial


easy felt cupcake pincushion tutorial muslim blog

The Pincushion photo tutorial shows a pincushion that my 6 year old daughter made, so apologies for the fact the sewing may not appear neat! I actually decided to make a pincushion for a blogger friend of mine and as my children love to copy -my youngest also made a pincushion, it really is that easy!
These can also be used as a felt toy - not just as a pincushion!

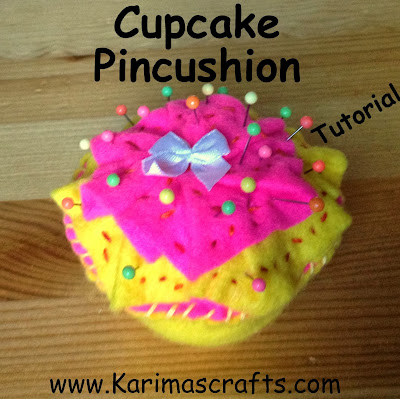
I forgot to take step by step photographs of the pincushion that I made, so I have used the photographs from the one my daughter made. I have included a photograph of the actual pincushion I personally made at the bottom of this post.

Requirements:
  • A paper cake case - to use as a template
  • 2 or more contrasting pieces of felt.
  • A variety of coloured embroidery thread
  • Stuffing
  • Needle / Scissors

easy felt cupcake pincushion tutorial muslim blog


Step 1: Using a paper cupcake - place on your felt upside down and cut out a circle piece of felt - so the circle will be the same shape as the widest part of the cupcake. You could make a paper template first as shown in the photograph. This circle will be the top part of the cupcake.
Step 2: Using scissors cut out down the side of the cupcake case and then cut out the small circle shaped base of the cupcake case.
Step 3: Then use the 2 cut pieces, circle and crescent shape as a template to cut out your felt. The small circle will be used for the base of the cupcake. The crescent shape will be the outside edge of the cupcake.
Step 4: Now cut out 2 different strips of felt - this will be used to decorate the top of the cupcake. The size I used was 2.5cm x 30cm (30cm as this was the width of my felt!)

easy felt cupcake pincushion tutorial muslim blog

Step 5: Take the large circle and a contrasting colour of rectangle shaped felt and place it around the centre of the circle (leaving a gap in the middle of the circle), folding it over and hand stitching it to the circle as you go along. Try to make sure that you make sure the end part is twisted under to make it look neater.
Step 6: Repeat the above step with the other piece of felt, this time make sure you place the felt into the very centre, so that you can see the different lengths of felt. You now have your icing finished.
Step 7: Using different coloured threads, make plenty of small straight stitches all over the icing you designed. These are meant to look like sprinkles and help secure the felt icing to the top of the cake.
Step 8: Now stitch the 2 short ends of the piece of felt that is for the side of the cupcake. Then using ordinary stitches secure the outside of the cake to the to top part you designed.
Step 9: Once you have attached the side, you then need to place your stuffing into the cupcake and then with hand stitches place the small circle (base of the cupcake) to the rest of the cupcake.
Step 10: Add extra decoration if you prefer - my daughter decided to add a bow!

You now have a cupcake that can be either used as a pincushion or as a felt toy!

I searched YouTube for a video tutorial of a felt cupcake tutorial and found this one, which is pretty similar in showing how to attach the pieces! http://www.youtube.com/watch?v=vA8PcXbwG9U

Here is the photograph of the one I made using a very similar design, except I added an extra layer on top by making another long rectangle but this time with curves along one edge!


easy felt cupcake pincushion tutorial muslim blog


Thursday 3 October 2013

Eid Gift Swap 2013

 This year I participated in an Eid Gift Swap with another Blogger, Sheen from fabulositystudio. We originally planned to do this at Eid Al Fitr but we ended up both being too busy during Ramadan, so we decided that we would do this for Eid Al Adha instead.

We both decided that the theme would be 'handmade' and gave each other a budget limit as we would also be paying for postage costs! We had to prepare these early as Sheen was going away before Eid so we sent these to each other last week. I had a bit of a panic on though because I had left things a little too late and my grandmother took poorly unexpectedly. This meant I had to spend time at the hospital for a few days so couldn't do what I had originally planned!  This meant I had to compromise and send her some handmade gifts that my children had made as well as the gifts I personally made.

I designed an Eid Card and printed this off on the computer, I made a Felt Brooch and a Felt Cupcake Pincushion. My 11 year old made the Eid prayer beads and my 6 year old made the Felt Star Key Ring.

The photograph below shows the lovely gifts I received from Sheen.

I received a lovely Gold coloured Eid Card with a lovely personalised message inside. I also received a Pincushion Box (this is one thing we agreed to both make). She also sent her own Handmade Face Mask and Handmade Body Oil.  There were also 2 Handmade Brooches which she made from earrings! Also included were a couple of Headbands for my girls and 2 lovely scarves. I know the gifts are for Eid but my daughters have already been wearing the headbands! I will however wait until Eid before I use any of my gifts Insha'Allah.

My blog post this week was the tutorial for the felt brooch that I made for Sheen: easy-felt-flower-tutorial

I have also previously made a tutorial for the felt Key Rings during Ramadan, here is the link: felt-key-rings-30-days-of-ramadan


I will also be making a Tutorial post for the Felt Cupcake Pincushion that I made for Sheen very soon Insha'Allah.