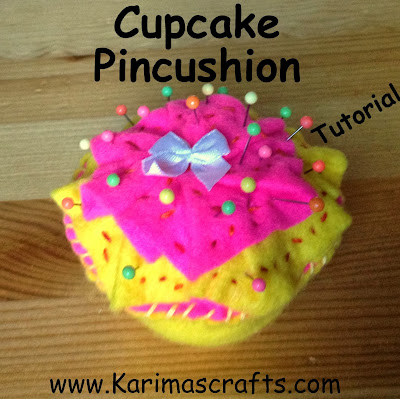
The Pincushion photo tutorial shows a pincushion that my 6 year old daughter made, so apologies for the fact the sewing may not appear neat! I actually decided to make a pincushion for a blogger friend of mine and as my children love to copy -my youngest also made a pincushion, it really is that easy!
These can also be used as a felt toy - not just as a pincushion!
I forgot to take step by step photographs of the pincushion that I made, so I have used the photographs from the one my daughter made. I have included a photograph of the actual pincushion I personally made at the bottom of this post.
Requirements:
- A paper cake case - to use as a template
- 2 or more contrasting pieces of felt.
- A variety of coloured embroidery thread
- Stuffing
- Needle / Scissors
Step 1: Using a paper cupcake - place on your felt upside down and cut out a circle piece of felt - so the circle will be the same shape as the widest part of the cupcake. You could make a paper template first as shown in the photograph. This circle will be the top part of the cupcake.
Step 2: Using scissors cut out down the side of the cupcake case and then cut out the small circle shaped base of the cupcake case.
Step 3: Then use the 2 cut pieces, circle and crescent shape as a template to cut out your felt. The small circle will be used for the base of the cupcake. The crescent shape will be the outside edge of the cupcake.
Step 4: Now cut out 2 different strips of felt - this will be used to decorate the top of the cupcake. The size I used was 2.5cm x 30cm (30cm as this was the width of my felt!)
Step 5: Take the large circle and a contrasting colour of rectangle shaped felt and place it around the centre of the circle (leaving a gap in the middle of the circle), folding it over and hand stitching it to the circle as you go along. Try to make sure that you make sure the end part is twisted under to make it look neater.
Step 6: Repeat the above step with the other piece of felt, this time make sure you place the felt into the very centre, so that you can see the different lengths of felt. You now have your icing finished.
Step 7: Using different coloured threads, make plenty of small straight stitches all over the icing you designed. These are meant to look like sprinkles and help secure the felt icing to the top of the cake.
Step 8: Now stitch the 2 short ends of the piece of felt that is for the side of the cupcake. Then using ordinary stitches secure the outside of the cake to the to top part you designed.
Step 9: Once you have attached the side, you then need to place your stuffing into the cupcake and then with hand stitches place the small circle (base of the cupcake) to the rest of the cupcake.
Step 10: Add extra decoration if you prefer - my daughter decided to add a bow!
You now have a cupcake that can be either used as a pincushion or as a felt toy!
I searched YouTube for a video tutorial of a felt cupcake tutorial and found this one, which is pretty similar in showing how to attach the pieces! http://www.youtube.com/watch?v=vA8PcXbwG9U
Here is the photograph of the one I made using a very similar design, except I added an extra layer on top by making another long rectangle but this time with curves along one edge!


clever idea!
ReplyDeleteIt looks just great! I am quite amazed your 6 years old can do this, when I am sure I would have a hard time making something that looks as nice as hers.
ReplyDeleteIt's obvious she is an artist, like her mum!!
Hope you are all well Karima. Love from France. xx
This is just too cute. And mashAllah I'm continuously amazed at how well your 6 year old sews!
ReplyDeleteHi Karima,
ReplyDeleteHope you doing great!
I love this cupcake pin cushion it's so cute and I even loved the mecca display piece that you made during Ramadan that's my fav piece, I am going to make that today.Thank you for stopping by and following my Pinterest board http://www.pinterest.com/honobnoor/boards/ it means a lot to me, I would love to invite you over to come and join me on my website as well http://letstrycreating.com/ too, I have lot's of new eid projects in making that I would soon be posting there so follow me there and you won't surely miss any post.
Hope to see you around more,
Take good care,
Best wishes
XX Noor